Form Settings
Here’s what to do:
1. Read the text
2. Select ‘Mark Complete’
Once you have finished creating the content of the form, you can update the settings which includes determining when the form is available to be responded to and who should respond.
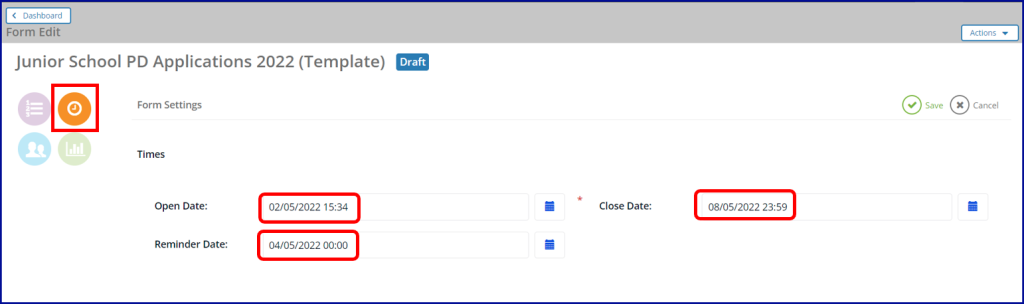
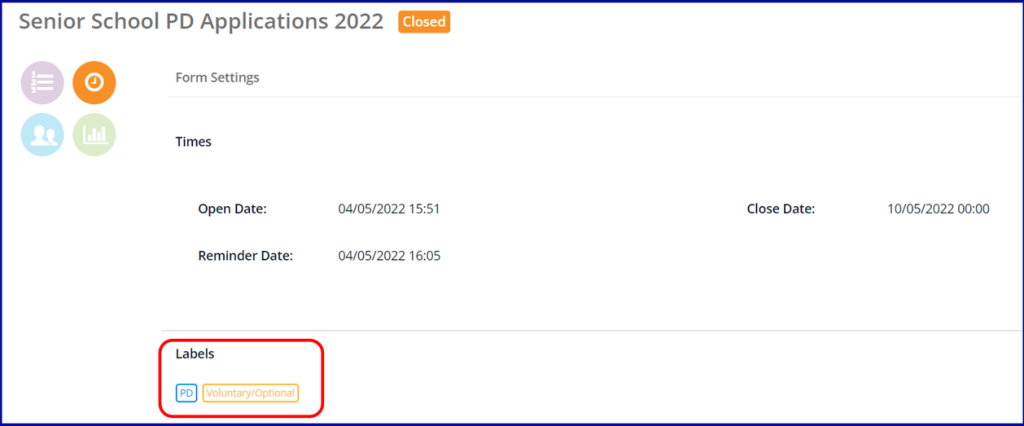
Setting Form Dates
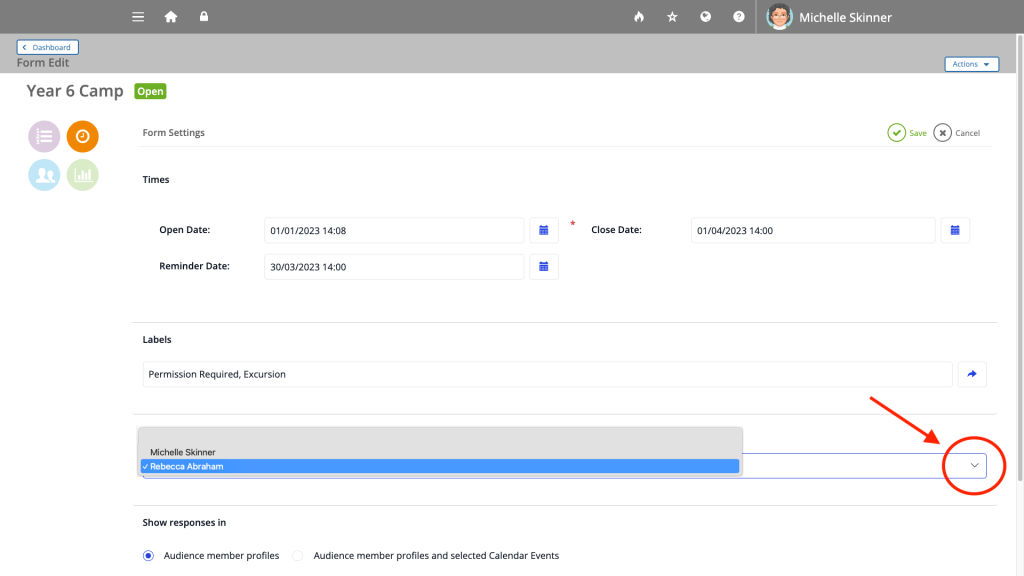
Click on the Form Settings icon, then click Edit in the top right corner. You can then add the Open Date and Close Date, which are mandatory. The Open Date is the date that you’d like the form to appear in the Audience Members‘ Action Required space on the Home Page. You can also add an optional Reminder Date.
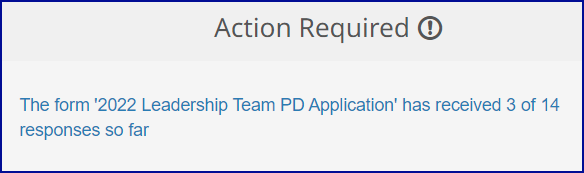
The Form Creator will see a notification in the Action Required area of their Home Page to provide them with a status update on Responses to their Form.
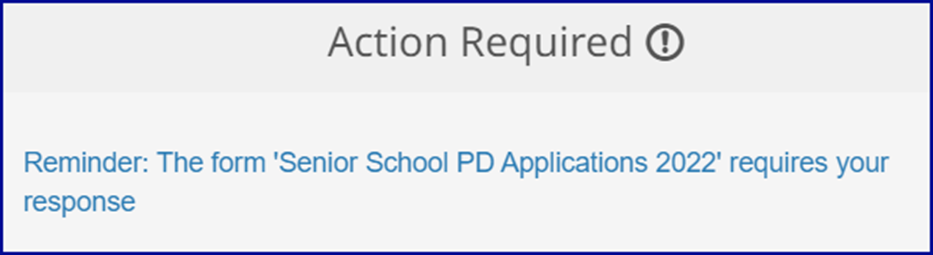
Any of the Form’s Audience who have not submitted their responses by the Reminder Date will receive a reminder via the Action Required area of their Home Page on the nominated reminder date.
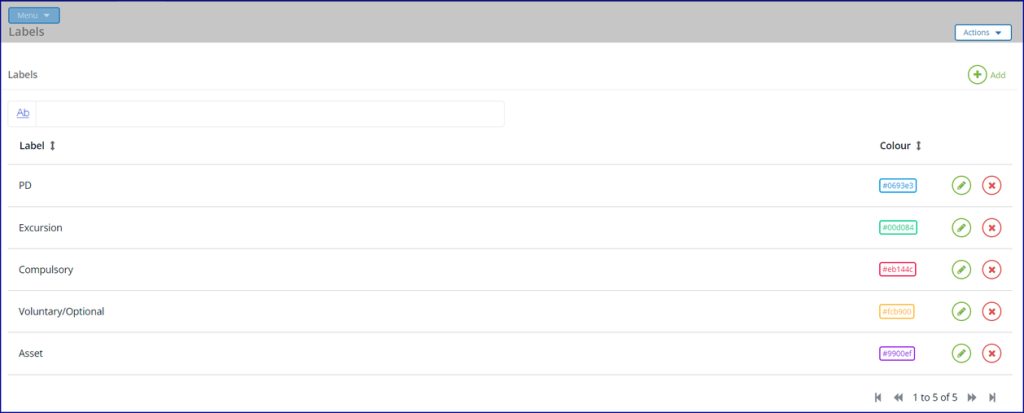
Adding Labels
You can also add labels to help you categorise your forms.
To create, delete or edit Labels, navigate to Menu > Labels from the Forms Dashboard.
You can create as many labels as you like and assign each of them a different colour for easy identification.
Changing the Form Owner
Forms Administrators can change the owner of the form, which by default, is the Form Creator.
The dropdown list in the Owner section will show Forms Administrators and Form Creators who can be assigned as the new owner of the form.
Once assigned as the Form Owner, the user will be able to view all details of the form, make changes and view the responses to the form.
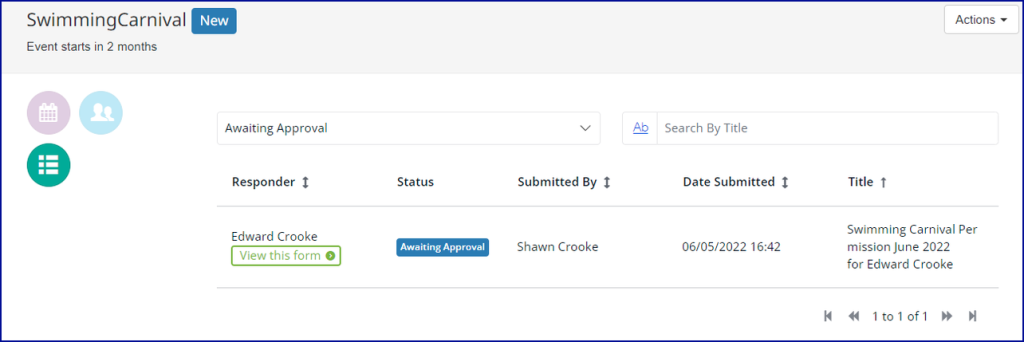
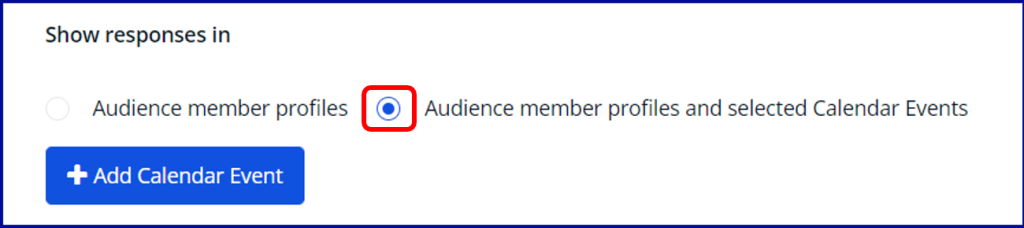
Linking Forms to Calendar Events
You can choose to link your form to a Calendar Event, which will allow you to see the responses to the form from within the Calendar Event.
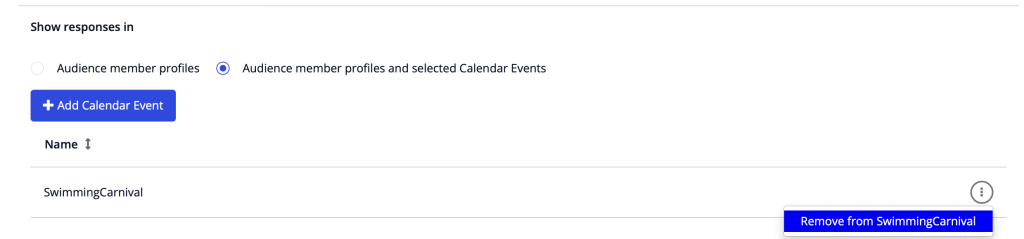
Select Audience member profiles and selected Calendar Events, which will enable the Add Calendar Event button.
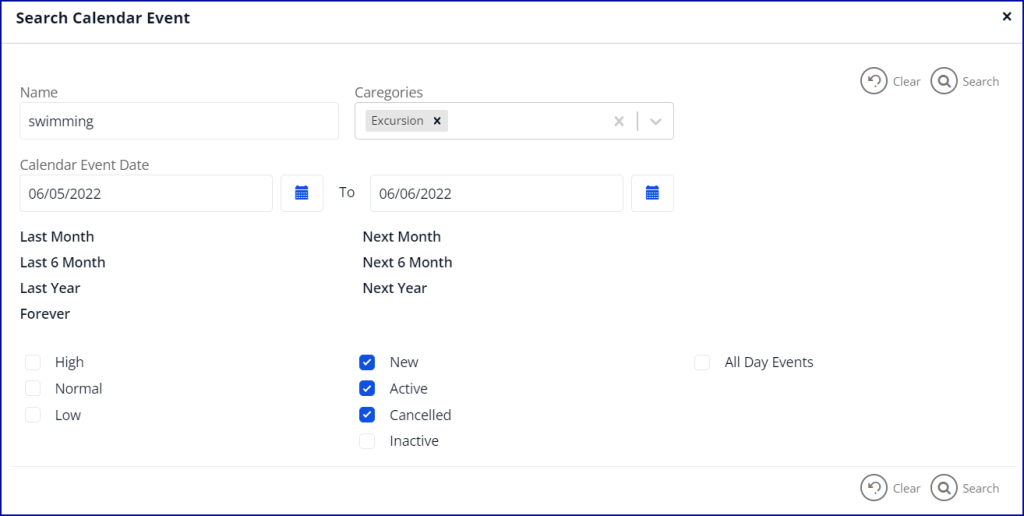
Then use any of the available search fields to find the relevant Calendar Event(s).
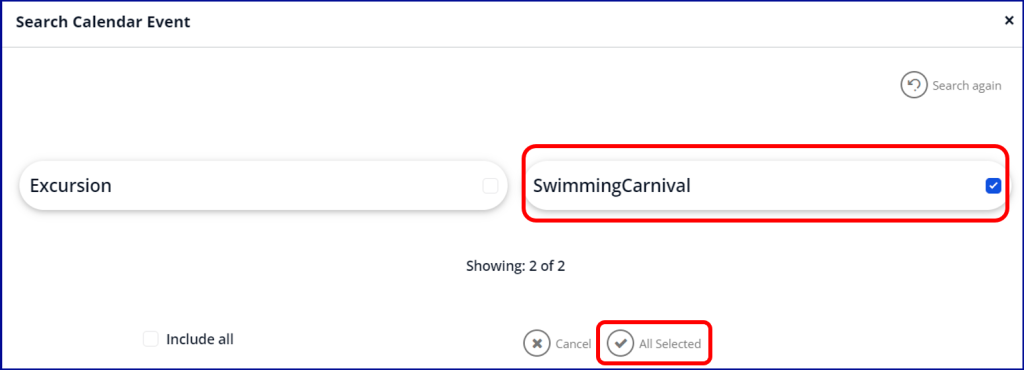
Select your required Calendar Event(s) from the list and click the All Selected button.
You will then be able to see your Calendar Event(s) on the settings page. You can remove it later by clicking on the three dots to the right of the Calendar Event and selecting Remove.
Your Form is now attached to your Calendar event.
Responses to the Form will also be visible and searchable by Response Status within both the Calendar Event and the Form.